
| Best Viewed 800x600 |
| Emulators |
| ROM's |
| Cabinet |
| Other |
| Affiliates |
| Topsites |
 |
 |
| Contact Me |
| I am: |
| Statistics |
|
|
| FastCounter by bCentral |
|
Cabinet Traditionally, there are 3 steps to building your own arcade monster. The first step to creating an arcade cabinet is to create a design you wish to use. Mine was a simple, easy to make design, but you can make yours as complicated as you like. Next, you must take into account what you want your arcade machine to include (ex. steering wheels, yokes, joysticks, etc.). And finally, build the thing! Here is a list of tools you will need to make one, just to give you an idea of the work and skill involved. |
| Skil or Table Saw | Tape Measure | Framing Sqaure & Bubble Level | Drill and various bits |
| Electric Screwdriver | Sandpaper | Soldering Iron | Masking Tape |
|
That's basically all you need. Now if you live in a large city, such as New York, and have never even seen a 2x4, I suggest you leave this site NOW! This takes alot of planning and alot of work is involved. This isn't just a little project that you can do, and quit in the middle and have wasted $70. Carpentry and ALOT of computer skill is involved in this. So before you start making your own, don't say I didn't warn you if you mess up in the end and have wasted $200, or more!¡! Here's the harware stuff you need... |
| QTY. | DESCRIPTION | PRICE EA. (in US $) | TOTAL |
| 2 | 4'x8'x5/8" or 3/4" Particle Board | 13.95 | 27.90 |
| 2 | 2"x4"x10' | 2.49 | 4.98 |
| 1 | 2'x3' Plexiglass | 11.70 | 11.70 |
| 1 | 3/4 lb. Bag of 1 1/2" Wood Screws | 2.17 | 2.17 |
| 4 | Black Spray Paint | 3.00 | 12.00 |
| $58.75 |
|
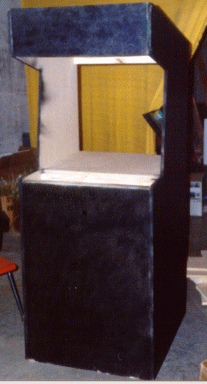
First, I took the design I had made, and drew it to scale. Next, I used a framing square and bubble level to trace my design on the particle board. Next, I cut out the design using a skilsaw, jigsaw, and drill for the inside corners, then repeated the process for the other sheet of particle board. Next, I cut the 2x4's in two foot lengths. You will need approximately nine or ten of these to support the cabinet correctly and make it sturdy. Place two 2x4's flat on the bottom, and two flat where the monitor shelf will be. Use a bubble level to make sure the shelf will be level. It is extremely important that the monitor shelf is level. Next cut one of the remaining peices of particle board to a 2'x21" or whatever will fit the cabinet for a monitor shelf. Place this peice on top of the 2x4's and screw it down securely with ten screws. For the front, cut out a 2'x30 3/8" peice of particle board. Placing it in front of the cabinet, enter the back of the cabinet at put two 2x4's on each edge and one vertically square on the top. Screw the front to these, and then screw the side of the cabinet to the 2x4's. This is what it should look like so far-or something like this. 
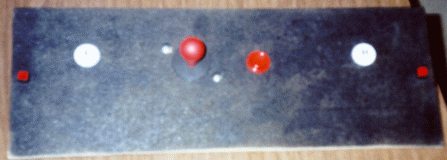
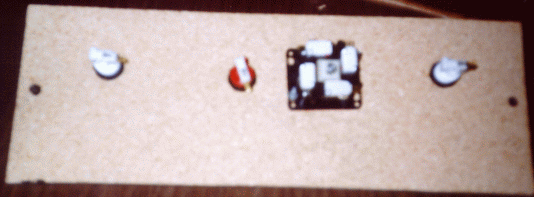
If you have done correctly so far, you should have a peice of particle board left that is almost exactly the right size for the top. Place a 2 2x4's horizontally on each side of the machine, and screw the top to it. Next cut out three peices of particle board for the front top marquee, the speaker panel, and the control panel. ATTENTION--IT IS IMPORTANT THAT THE MARQUEE IS NOT AS FAR OUT AS THE OTHER PEICES OF THE MACHINE. IT SHOULD BE RECESSED SO YOU DON'T HIT YOUR HEAD ON IT WHEN PLAYING! Now, CAREFULLY take the arcade cabinet outside, and spray paint it. Using drill bits, cut the holes for the buttons and joysticks out. The control panel should be the last thing you put on the cabinet. Next cut out a 3 1/2" hole in the speaker panel for the sound to escape through. Put the marquee and speaker panel onto the cabinet. After soldering all wires to the proper places, assemble the control panel, and place it on the arcade machine. Here's what mine looks like. 

After everything is completed, your machine should look similar to this.  --WARNING RISK OF ELECTRICAL SHOCK INVOLVED! I AM NOT RESPONSIBLE FOR WHAT YOU MAY DO TO YOURSELF AND TO ANY HARDWARE, SOFTWARE, HOUSEHOLD APPLIANCES, OR ANYTHING ELSE ELECTRICAL. FOLLOW THESE DIRECTIONS EXACTLY AS WRITTEN OR DO NOT ATTEMPT THIS IF YOU'RE NOT GOOD WITH ELECTRICTY--I made my own switch which powers up the entire arcade machine. To do this, simply buy a cheap power strip (about $5.00 @ Dollar General) and a toggle switch from Radio Shack (SPST or DPDT). I used a DPDT (double pole/double throw) for mine, but I would suggest a SPST for the lesser risk of electrial shock. You also need to buy a package of wire nuts. First, drill a hole in the top of your cabinet-1 inch is perfect, and make sure you can reach it from the front of the cabinet. Next, find a spare peice of masonite, and drill a hole in it the appropriate size for the top of the switch to fit through. Now, open up the power strip, MAKE SURE IT'S UNPLUGED, and strip back the rubber around the power cord, until it is stripped about 1 inch away from where it runs inside the power strip. Now, cut the BLACK wire from the power cord in the middle. There should be about 1 or 2 inches of wire on both sides of where you cut. Carefully, use wire strippers to remove the rubber surrounding the wire. Now find two extra peiecs of wire, both about 4 inches long, and using wire nuts, connect 1 wire to the wire you cut in the power cord, and the other to the cord you cut which runs inside the power strip.. Now, where the power cord comes out of the strip, put the wires there and close up the power strip. Next if your using a SPST switch, solder the wires to each terminal on the switch, attach the switch to masonite using the nuts that came with it, and tack the masonite to the hole, so that the switch sticks out the top of the hole, and find a screw or nail that will hold the power strip to the underside of the top of the cabinet. If your using DPDT, then solder the wires to terminals 2 and 3, and attach the switch to the masonite. Now make sure that no wires are touching each other and that everything is connected tightly, THIS IS VERY IMPORTANT!¡! Now, connect all the components to the power supply, switch them all on, then switch power strip switch on, plug up the strip, and switch the toggle switch to on. If all worked correctly, then it will appear the system powers up with one switch, exactly like an arcade machine! This really adds to the reality of it, instead of having to switch about 3 switches, you only have to do one. If your computer will not turn on with out the power switch being pressed, then change the power settings in the system configuration. Now you only have to switch 1 switch to power up and shut down the arcade machine. I will post pictures as they become available.
WWWWWWWWWWHHHHHHHHHHHHHEEEEEEEEEEWWWWWWWWWW!!! How did you like my LITTLE schpiel. Now entertain yourself, family and friends with this monster! PS--If you get a coin mech, I suggest charging everyone a quarter to play to make up the money you spent, and then some. |